Vacuum impregnation is used in many different manufacturing processes to enhance mechanical strength, seal surfaces and to enhance electrical insulation properties.
Watch our video, here: The VPI Cast coating system
One of the most common application for impregnating compounds is in electrical transformer manufacturing. Transformer coils are impregnated for some or all of the following reasons:
- Increase the overall dielectric strength
- Improve the structural integrity of the coils
- Reduce or eliminate winding noise
- Improve heat transfer
- Reduce partial discharge
- Provide increased environmental protection
 The main purpose of vacuum impregnating transformer coils is to remove as much air as possible from the structure and replace it with epoxy which has significantly better dielectric strength. In addition, epoxies are excellent adhesives and will solidly bond the wires and other components of the structure to form a strong, solid assembly. As a side benefit, this also reduces noise during operation.
Material Requirements
Impregnating compounds are not designed to provide high build rates. They are designed to penetrate and seal the "nooks and crannies" of the structure.
The best products have the following features:
- Reasonably low viscosity
- Reasonably good shelf life
- Long working time (pot life)
- Good dielectric strength
- High vapour pressure
- Operating temperature rating to match or exceed the rating for the coil
- Moderate cure temperature
Typical steps in coil impregnation:
Although the steps involved in coil impregnation may vary depending on the material used, the following could be considered as general using a single component impregnating compound such as our popular CLS 9310 single component epoxy.
Recommended Equipment:
- Oven capable of reaching and maintaining the required cure temperature.
- Vacuum tank of sufficient size (also capable of sustaining pressure for best results)
- Sheet metal tray to hold the coil during the cure cycle in the oven
- Silicone based mould release to prevent adhesion to the tray.
- A vacuum pump of sufficient size to develop and maintain a minimum vacuum level of 29" (982.05 Millibars) or better.
- Pour the CLS 9310, single component epoxy, into a suitable size vacuum vessel (large enough to accommodate the coil to be impregnated with sufficient room to allow the material to rise while de-airing)
- Slowly agitate the epoxy in the vacuum tank for 5 to 10 minutes to make sure that the mix is uniform
- Dry the coil to be dipped in an oven (at a high enough temperature to drive off any residual moisture, oil components and other volatiles. Minimum 100oC)
- Allow the coil to cool back down to room temperature (DO NOT IMMERSE HOT WINDINGS IN SINGLE COMPONENT EPOXY!!!!!). The heat activated hardener component is part of the mix and the heat from a hot component will trigger the curing process.)
- Immerse the cool coil assembly into the epoxy contained in the vacuum tank.
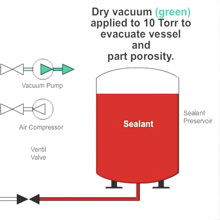
- Draw vacuum (minimum 29" or 982.05 Millibars) for 5 to 10 minutes (until the material no longer rises) (see note #4)
- Once the vacuum is released, pressure may be applied (approximately 10-15psi) to the tank to drive the epoxy into all the hard to reach cavities. This step is not normally necessary but the results will be improved especially on very complex windings.
- Withdraw the coil assembly from the vacuum tank and let the excess material run off back into the tank. (see note #1 below)
- Place the coil assembly on a steel (sheet metal) tray coated with mould release. (see note #2 below)
- Leave the coil assembly on the tray and place it into the cure oven pre-heated to 125oC
- Cure for at least 4hours (making sure that the coil assembly reaches 125oC for a period of 4hrs). (see note #3 below)
- Remove from the oven, let cool to room temperature. The coil is ready for assembly.
Notes:
- It is best to hang the coil over the dipping tank on an angle towards the hard to drain areas. This will ensure thorough draining of any excess material.
- The tray must be thoroughly mould released otherwise the epoxy will adhere to the tray. A silicone based mould release such as our CLA 8000 Mould Release
- It is critically important that the coil assembly itself reaches 125oC for a minimum of 4 hours. Do not trust the setting on the oven temperature controller. Make sure that the coil reaches 125oC for the duration of the cure schedule.
- Excessive vacuum or extended periods of vacuuming can result in the removal (stripping out) of the more volatile components from the formulation. It is best to maintain the recommended vacuum levels, just low enough to remove the air from the assembly.


