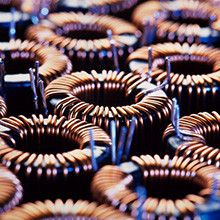
Cast, potted or impregnated devices containing cracks or voids within the insulation are susceptible to corona breakdown during operation. Persistent Partial Discharge (corona) will eventually degrade the insulation to the point where the device will eventually fail.
 Potting magnetic components with tightly wound, fine wire coils can become problematic, due to the difficulties in accomplishing through void free penetration of the impregnating / potting compound into the winding. This is where the vacuum / pressure process can become invaluable.
- The vacuum / pressure process will provide improvements in the following areas:
- Improved coil impregnation
- Better heat dissipation
- Non-existent or greatly reduced corona (partial discharge)
- Any residual bubbles of trapped gases are compressed and harder to ionize with reduced chance of arcing
- Less chance for internal stress cracks
The required basic equipment consists of a heated chamber, capable of withstanding both vacuum and pressure, with the appropriate accessory equipment to control each parameter (temperature, vacuum and pressure). The chamber must also be equipped with the appropriate openings to introduce the potting / impregnating compound while the component to be filled is under vacuum.
The typical process steps are as follows
Note: The mould or container should be open or have a sufficiently large opening (reservoir) to accommodate material shrinkage during gellation and allow the pressure to be transmitted to the assembly during the pressure cycle.
- Preheat the device in the mould or case at 135oC (275oF) for at least 4 hours. This is to remove moisture.
- Place the device in the mould into the chamber.
- Draw vacuum for a minimum of 40 minutes @ 1 - 2.5 mm Hg.
- Typically, preheat the resin / hardener mixture to 82oC (180oF). This will be different for different materials. The optimum preheat temperature will be determined by the available pot life (working time) and the temperature which results in the lowest "mixed viscosity”.
- Typically, de-air the mix for at least 15 minutes at 0.5 mm of Hg. Consideration must be given to the volatile components in the resin / hardener mix. The vacuum must be sufficient to thoroughly de-air the mix but at the same time, not "strip” volatiles out of the material.
- Introduce the mixed material into the vacuum chamber to fill the moulds under vacuum.
- Release the vacuum slowly and bring the chamber to atmospheric pressure.
- Pressurize the chamber to 50 psi.
- Typically, maintain pressure for 45 to 50 minutes. The time will vary depending on the working time of the compound being used. The goal is to allow the material to gel under pressure thereby insuring that residual voids are "locked in” under pressure.
- Release the pressure, remove the moulds and place into post cure oven if necessary.
Please note that the recommended steps are considered typical but may change depending on the characteristics of the potting / impregnating compound being used. It is best to follow the supplier’s recommendation for optimum results.
In most cases, some experimentation will be necessary to determine the best combination of de-airing time, de-airing temperature, lowest mixed viscosity and time to complete the process based on the available working time.


